> ## Documentation Index
> Fetch the complete documentation index at: https://conductorone-docs-google-workspace-action-examples.mintlify.site/llms.txt
> Use this file to discover all available pages before exploring further.
# Getting started with JIT access for AWS (using Identity Center)
> Follow this guide to get started with just-in-time (JIT) access to your Amazon Web Services (AWS) resources.
## Before you begin
To complete this guide, you'll need:
* C1 **Super Administrator** role
* AWS with Identity Center configured
* Ability to setup an AWS role trust
**Estimated time:** 30 minutes
## Step 1: Integrate your AWS instance
Integrate your AWS instance with C1. Follow our instructions to set up the [AWS v2 connector](/baton/aws).
Make sure to select these configuration options on the connector setup screen:
* Enable support for AWS Organizations
* Enable support for AWS IAM Identity Center
Once connected, C1 ingests all of the resources and entitlements for AWS. This includes accounts, roles within accounts, identity center users, identity center groups, and permission sets. You can see all the resources and entitlements by going to **Apps** > **AWS** and clicking the **Entitlements** tab.
## Step 2: Configure AWS accounts for JIT access
Now that AWS is hooked up to C1, set AWS accounts as available for just-in-time access. To do this, we'll configure access controls for each of the AWS accounts.
Navigate to the **Apps** page, then select the "AWS" application that was created from Step 1.
Click **Edit** in the **Entitlement configuration rules** in the **Access Controls** section.
In the configuration rules pane, click the toggle to **Enable configuration rules**.
Select the **account** resource type.
Use the **Access profiles** dropdown to select **Everyone**.
Finally, check the box at the bottom of the screen and click **Apply**.
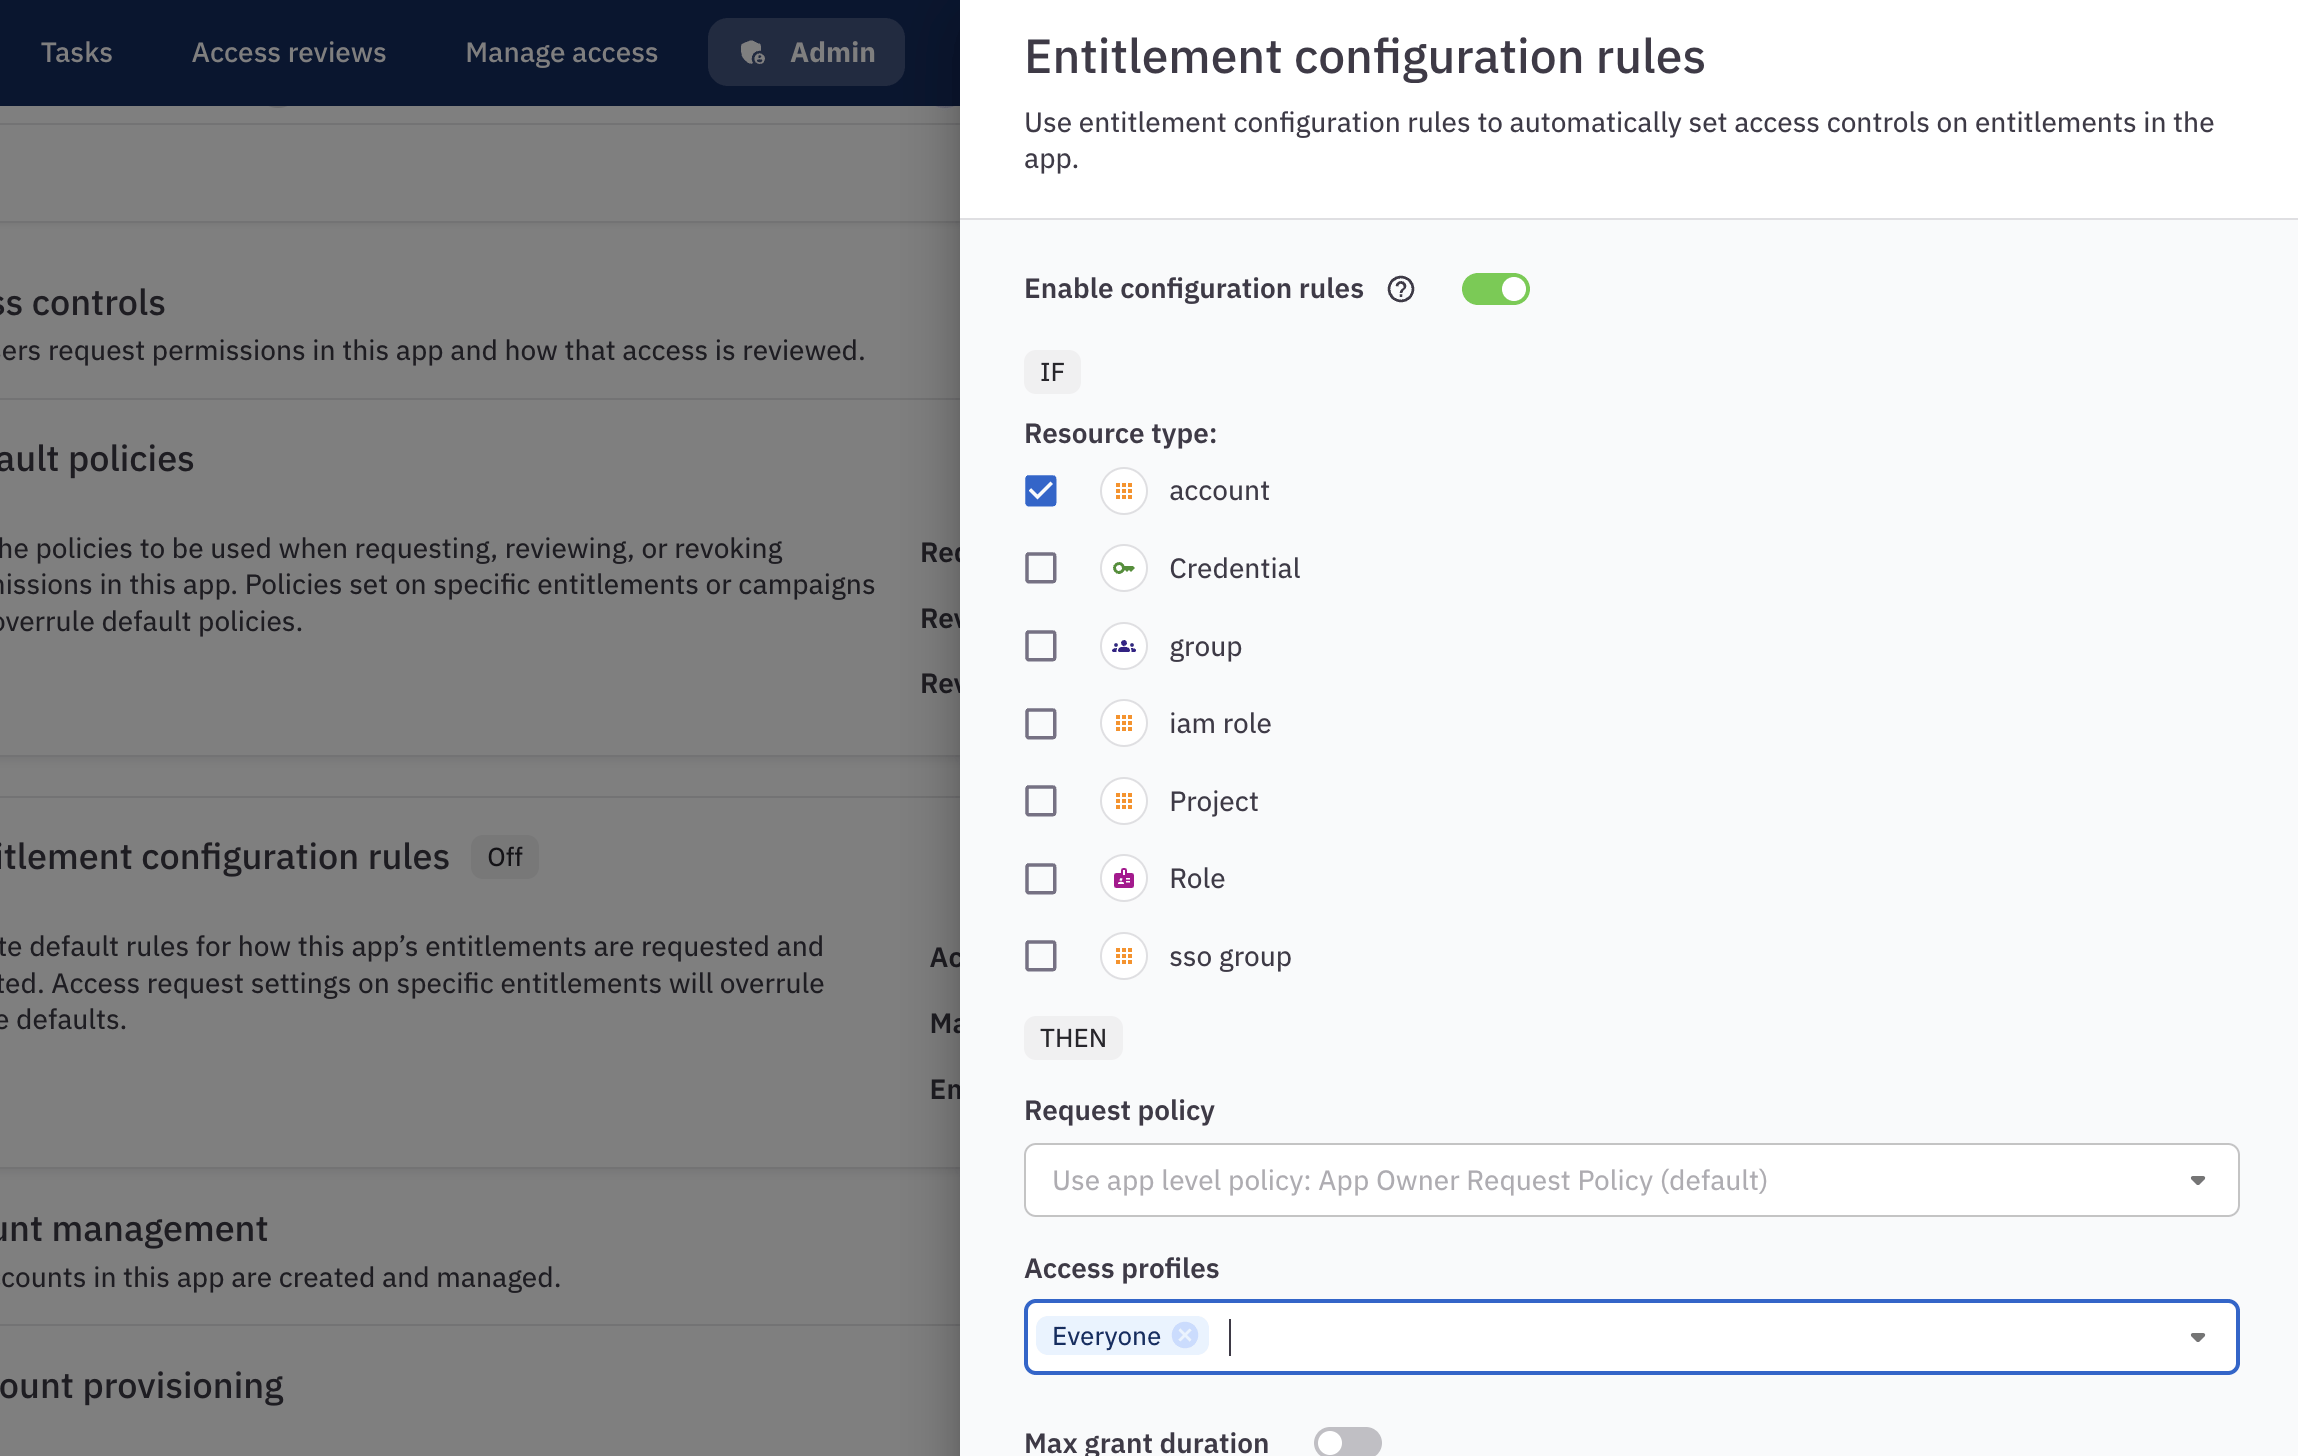 The new settings are applied, and a summary is shown in the **Entitlement configuration rules** section of the page.
**Don’t worry,**
you can change who can request access, for how long, and the policy for approving access later.
## Step 3: Request JIT access
Let's go request AWS JIT access!
In C1, click **Requests** and make sure that **App catalog** is selected.
Click **AWS**. A panel opens with the account resources available for you to request.
Click the account you want access to, then click **Request** on a specific role.
The new settings are applied, and a summary is shown in the **Entitlement configuration rules** section of the page.
**Don’t worry,**
you can change who can request access, for how long, and the policy for approving access later.
## Step 3: Request JIT access
Let's go request AWS JIT access!
In C1, click **Requests** and make sure that **App catalog** is selected.
Click **AWS**. A panel opens with the account resources available for you to request.
Click the account you want access to, then click **Request** on a specific role.
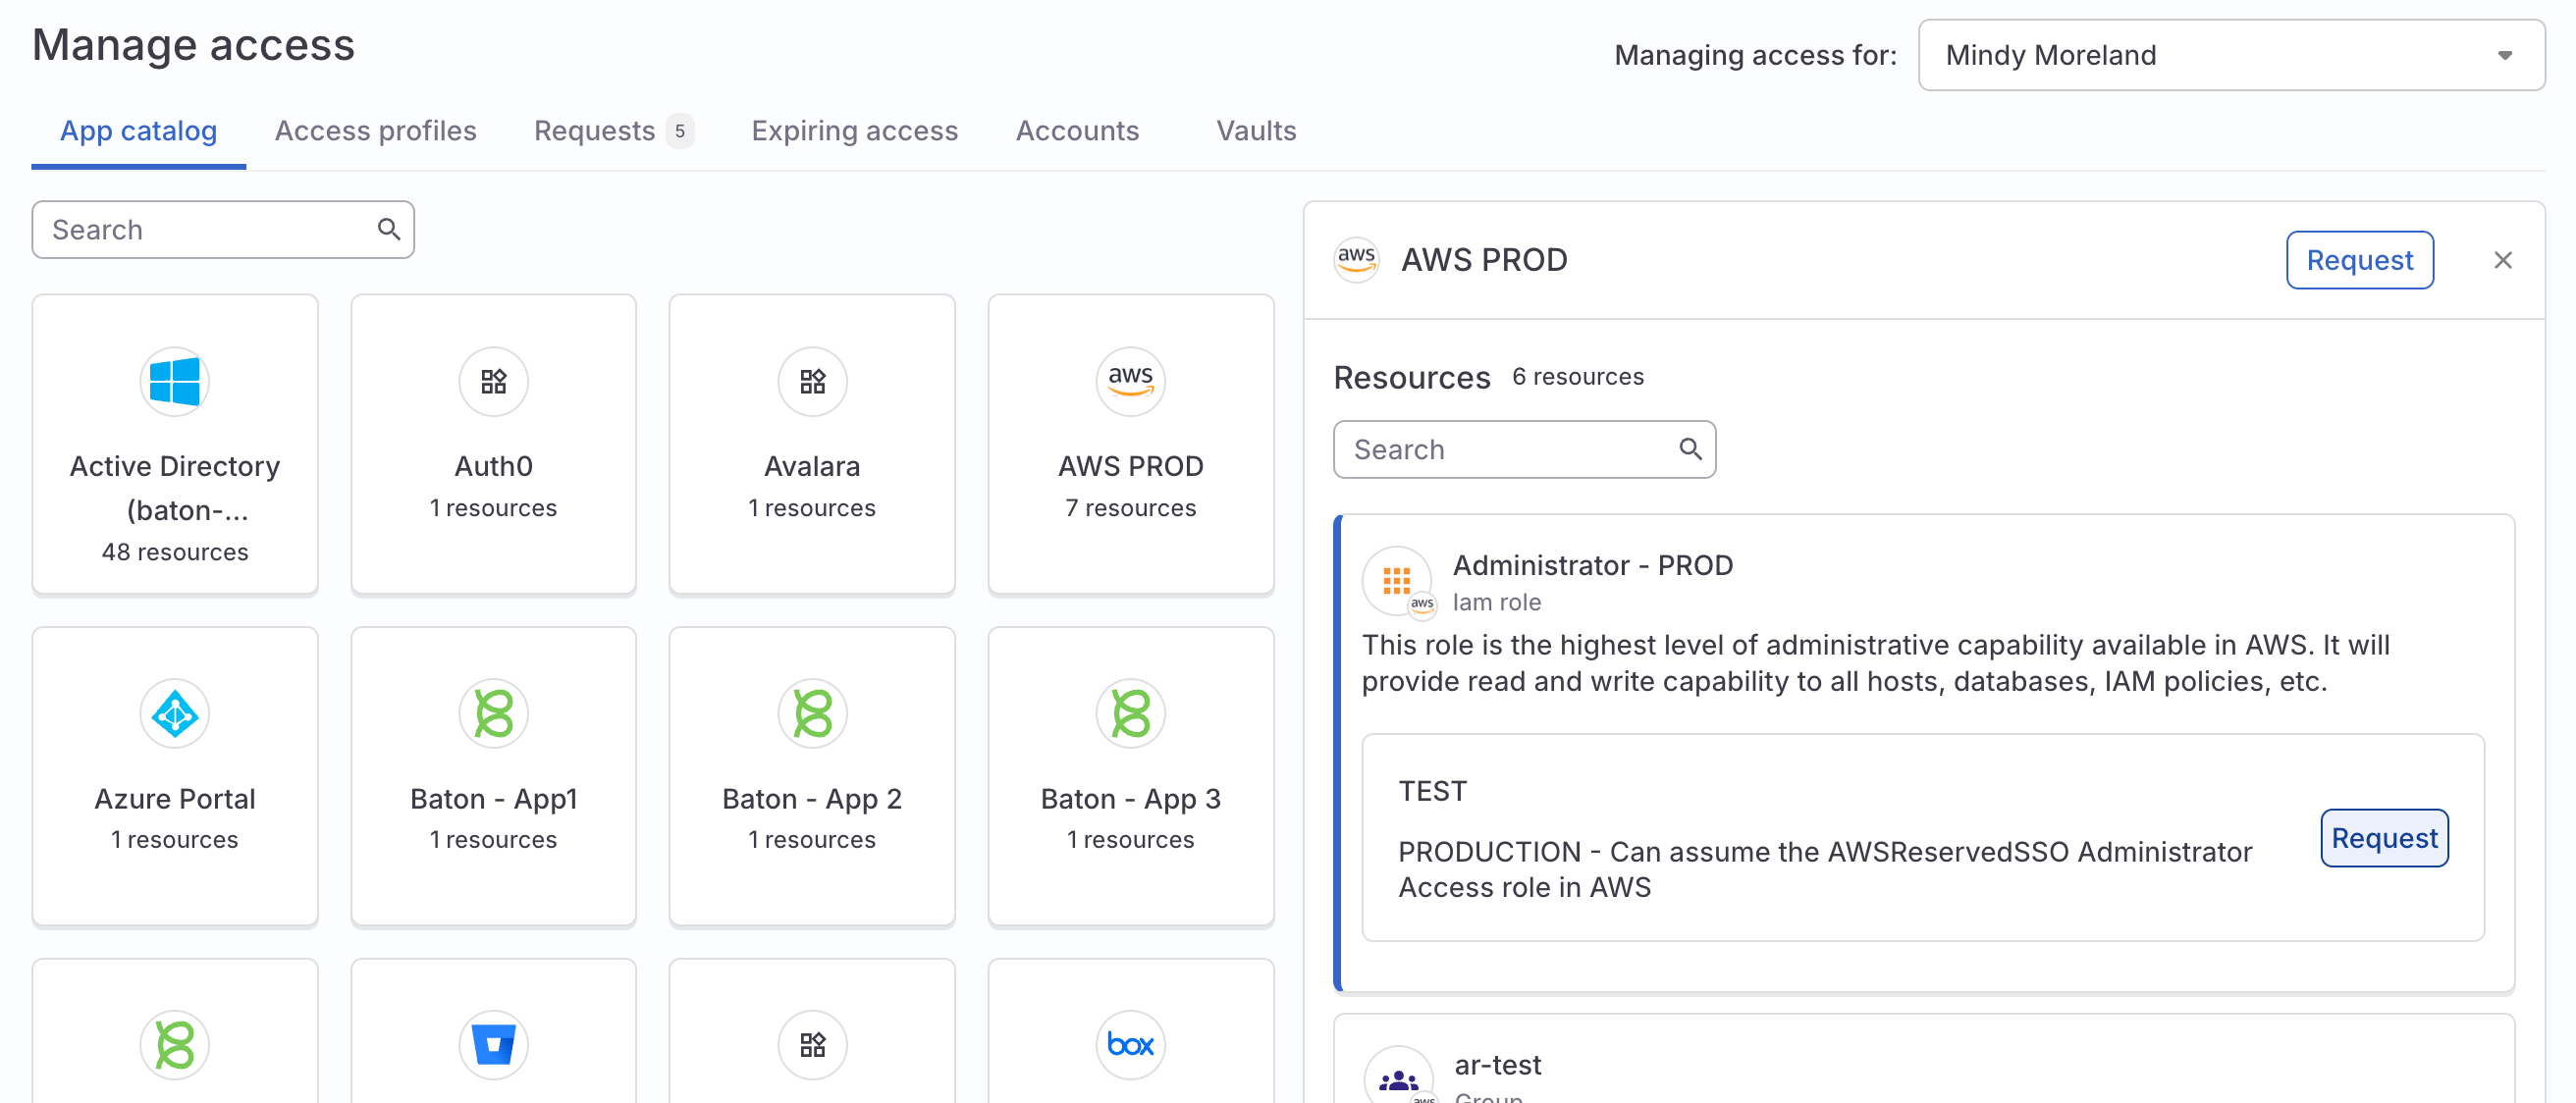 On the **New request** form that is shown, select the length of time you want access for.
Click **Submit request**.
## Success!
The request policy routes the request through the approval process. The new access will be automatically provisioned by the AWS connector, and then automatically removed upon expiration.
If you prefer working from the command line, you can also request and use AWS access directly from the AWS CLI using Cone. See [Use Cone with AWS SSO](/product/how-to/cone-aws-sso-integration).
On the **New request** form that is shown, select the length of time you want access for.
Click **Submit request**.
## Success!
The request policy routes the request through the approval process. The new access will be automatically provisioned by the AWS connector, and then automatically removed upon expiration.
If you prefer working from the command line, you can also request and use AWS access directly from the AWS CLI using Cone. See [Use Cone with AWS SSO](/product/how-to/cone-aws-sso-integration).